Minirack NAS Part 1
Planning and building
<--
A friend of mine acquired a 3D printer recently (Celsiusss), and as I have had one for quite some time, we started talking. He planned on building a new NAS using a partly 3D printed minirack. I also currently own one minirack, but when I built that one it had quite a different philosophy. I wanted to cram as much compute into it as possible. His idea intrigued me, so I set out to spec out a new NAS.
The core
The server
I really wanted to use a Lenovo M920q I had laying around from a “failed” firewall build I had done a couple months prior. It never really got off the ground so it felt nice to try and use it for a NAS. However, it only has one PCI-E slot, and I need (wanted) 10 Gb/s networking to use the array to its fullest. I got a devious idea to use a M.2 -> PCI-E adapter and just leave the bottom open, more on this later.
The rack
Since I had already built a mini rack previously (perhaps I will do a writeup on that in the future) I had the specific rack I wanted to print already. I went with this one by MRP. The modularity of it is unbeatable in my opinion. It also supports bolts which is way easier to get in my country.
The disks in this economy????
Yes, I hear you loud and clear. I think I picked the absolute WORST time to build a NAS. In my defense I did not get all new disks. A pre-requisite for this was to get the disks for relatively cheap. I ended up getting quite lucky on Finn.no (Norwegian Craigslist) and found 4x 14TB “shucked” HDDs. If I hadn’t gotten such a “good” deal on these drives I could probably not afford this kind of NAS today. Paid about 180€ each, the highest I have ever spent on Finn. All these had around 20-22k Power On Hours so I accepted this.
And yes, I now have 6… Ended up getting two more external drives and “shucked” them as well. Yes it was way too expensive. Thank you AI <3
The disk shelves
I had previously watched a video on making one’s own JBOD, and I was inspired to look up versions for miniracks. I stumbled on quite a few but I wanted one that was 8 wide. This led me to this one by RagingRoosevelt.
Building this atrocity
Now that the initial idea was fulfilled, I thought fuck it, I have some disposable income so let’s go!
The full BOM (Bill of Materials) can be found at the bottom of this post, along with approximate pricing for all of it.
The printing 💀
Wow, I did not realize what I got myself into with this project. I remember the printing taking a lot of time on the first mini rack, but that one I could assemble slowly over time. This one I had to get pretty much fully complete before I could even start using it. I ended up running my printer basically all the time I was home for a month.
In total my poor Ender 3 had to perform the following feat:
- 1479m of filament (about 4,5 kg)
- 204h 50m 46s of printing time
- 76 successful prints
- 77 failed prints (had a fucked hot-end for some time)
Honestly, after the 2nd time printing a minirack, I would just buy the rack in metal. As awesome as it is to have it fully color matched it is not worth the time.
The disk shelves
These were the COOOLEST to build. Honestly hats off to the designer Raging Roosevelt. They print quite nicely and just look awesome.
I did have to use a different model for the drive caddy part though, as it did not fit on the bed of my Ender 3. Found a remix by Vincent that solved that. This meant I had to use more screws and heatset inserts but that was fine.
The shelves use the backplane from a Jonsbo N3 case. These can be had on Aliexpress quite cheaply, or you can just give me a holler if you want one, I ordered 4 by accident, ooops.
Mounting the PSU wasn’t so easy
Due to the limits of my Ender 3, I cannot print a 3U tall model. Because of this the PSU plate used to mount it at the bottom did not fit. I ended up remixing this model and removed the bottom two holes. This was my first time remixing a 3D model so that was a learning curve!
The finished build
I know I gloss over a lot in this post, I hope the full BOM and pictures illustrate enough if you wish to do something like this in the future yourself. If not I can be contacted on: blog AT blobb.no.
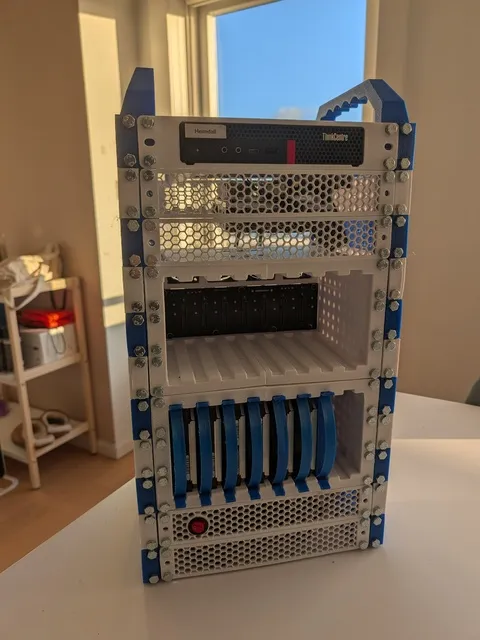
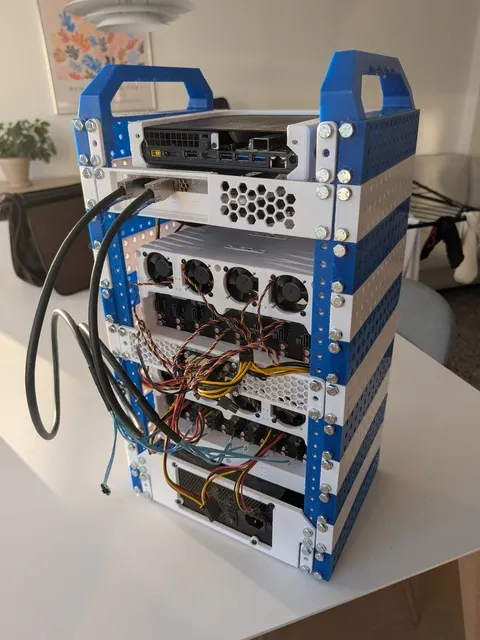
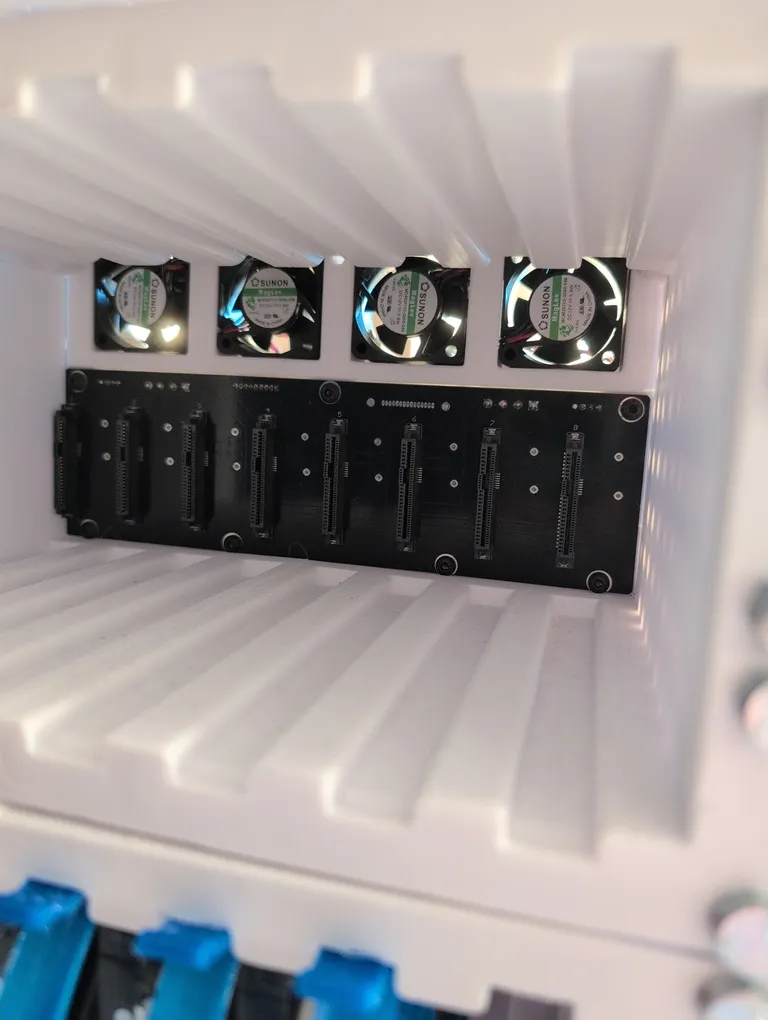
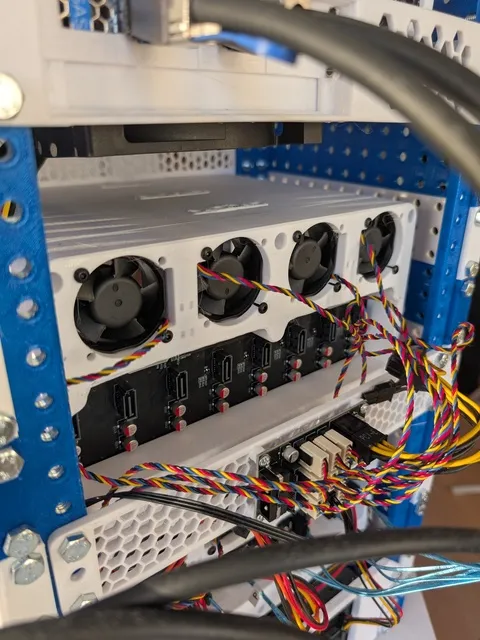
Fin
In Part 2 I will go over the software I ended up with (spoiler it is NixOS). I think I have quite the novel NAS now and it was loads of fun and learning building it. Even though I wouldn’t print the full rack again I would definitely make the NAS again!
BOM
I will only be providing links to the models to give attribution. The things I bought you will have to source yourself. Most was had from AliExpress.
- Minirack
- Filament:
- 3x spools of Generic White PETG
- 2x spools of Generic Blue PETG
- Hardware
- 88 M6x10 Bolts
- 88 M6 nuts
- Models used:
- Filament:
- Lenovo Thinkcentre M920q tiny
- LSI 9305e SAS HBA
- 4x Mini SAS HD SFF 8644 -> SATA cables
- Generic 500w ATX PSU
- Make sure you get one that can support 16 drives spinning up at the same time. As mine has a split 12V rail I had to source another one
- 8x Sunon MC40201V2-Q000-S99 4020 PWM fans
- Do not get these if you are in the same room as the NAS. I had to replace these with Noctua A4x20 fans.
- 2x Jonsbo N3 SAS/SATA backplane
- 1x ADT-Link R43 M.2 to PCIe 3.0 riser R43UR
- 1x 120GB SATA boot drive
- 6x 14TB shucked WD Elements external HDDs
- 1x 1TB SATA SSD